
Navigating Organizr Administration Settings #
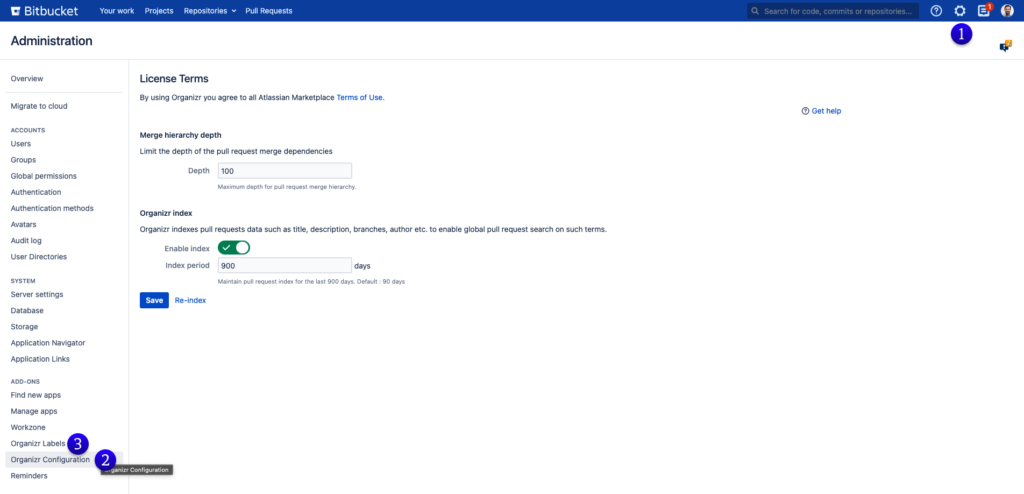
- Access this page through the Administration icon on the top right Bitbucket.
- Scroll down the left menu to “Organizr” under the “Add-Ons” section.
- Here you can also create, edit or delete labels in the Label Manager
Navigating Organizr Project Settings #
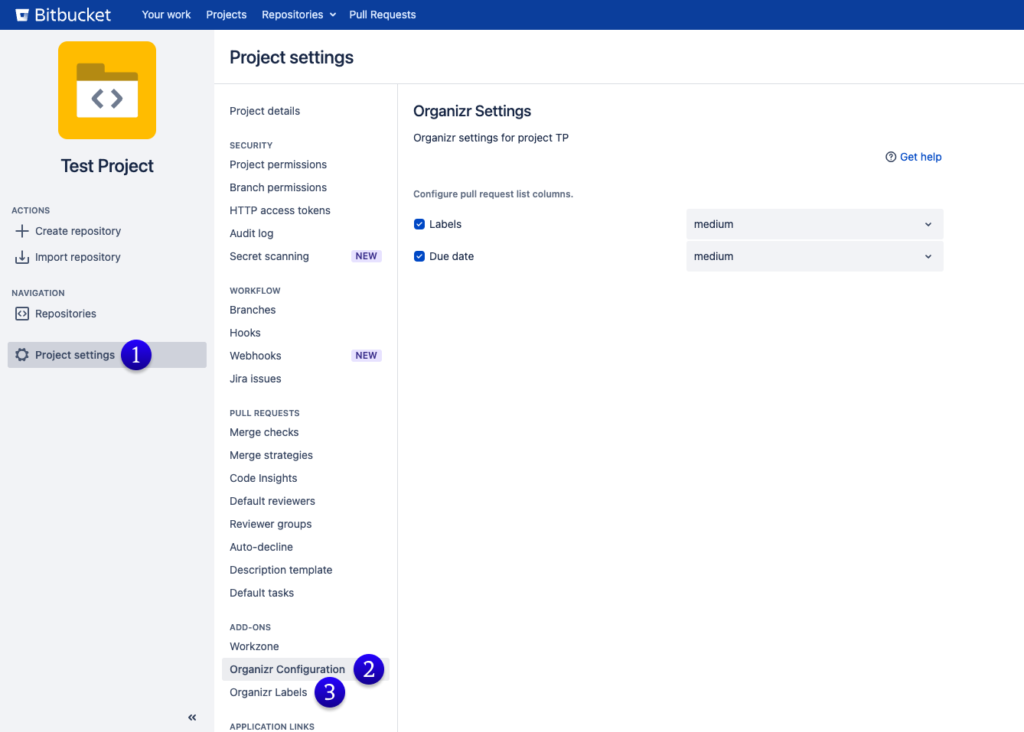
- Click on the “Settings” button in your Project.
- Scroll down to the “Add-Ons” section and click on “Organizr” – You have arrived at Organizr Settings, where you can make adjustments and continue with setting up Organizr.
- Here you can also create, edit or delete labels in the Label Manager
Navigating Organizr Repository Settings #
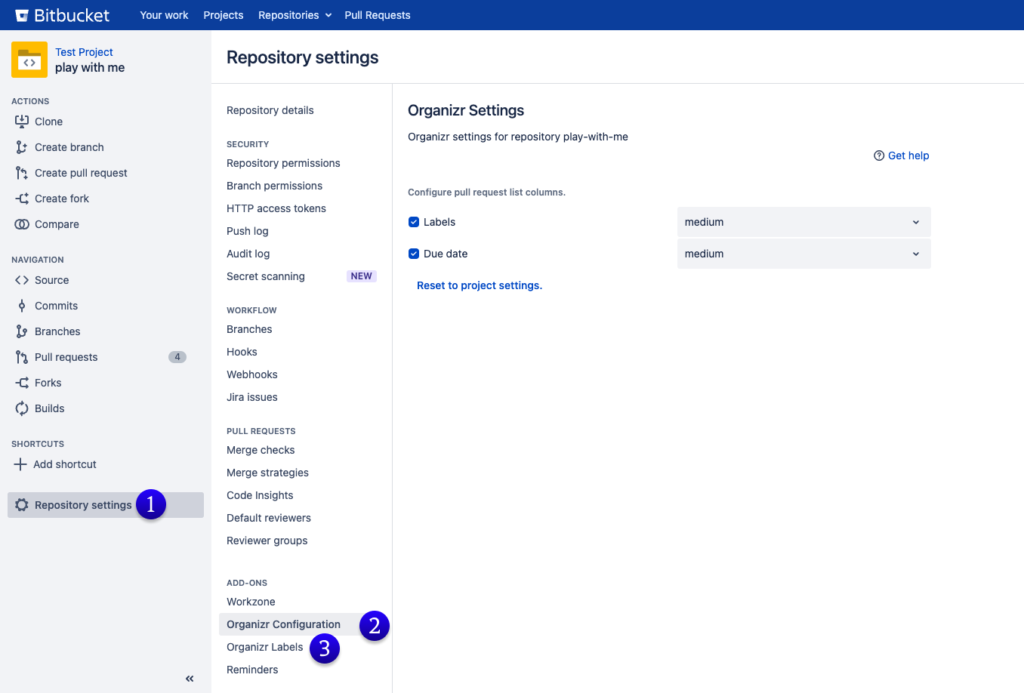
- Click on the “Settings” button in your repository.
- Scroll down to the “Add-Ons” section and click on “Organizr” – You have arrived at Organizr Settings, where you can make adjustments and continue with setting up Organizr.
- Here you can also create, edit or delete labels in the Label Manager