Via Bitbucket Marketplace (recommended) #
- Log into your Bitbucket workspace as an admin.
- Go to workspace settings and click Marketplace in the Apps and Features section on the left side menu.
- To locate the Workzone app in the long list of apps, click on Categories dropdown and select Workflow.
- Find Workzone: PullRequest Workflow in the list and click on the app tile.
- Click Add to start installing the Workzone app.
- Workzone will request app access permissions. Click Grant access.
- Refresh the page to load Workzone menu items.
- You’re all set!
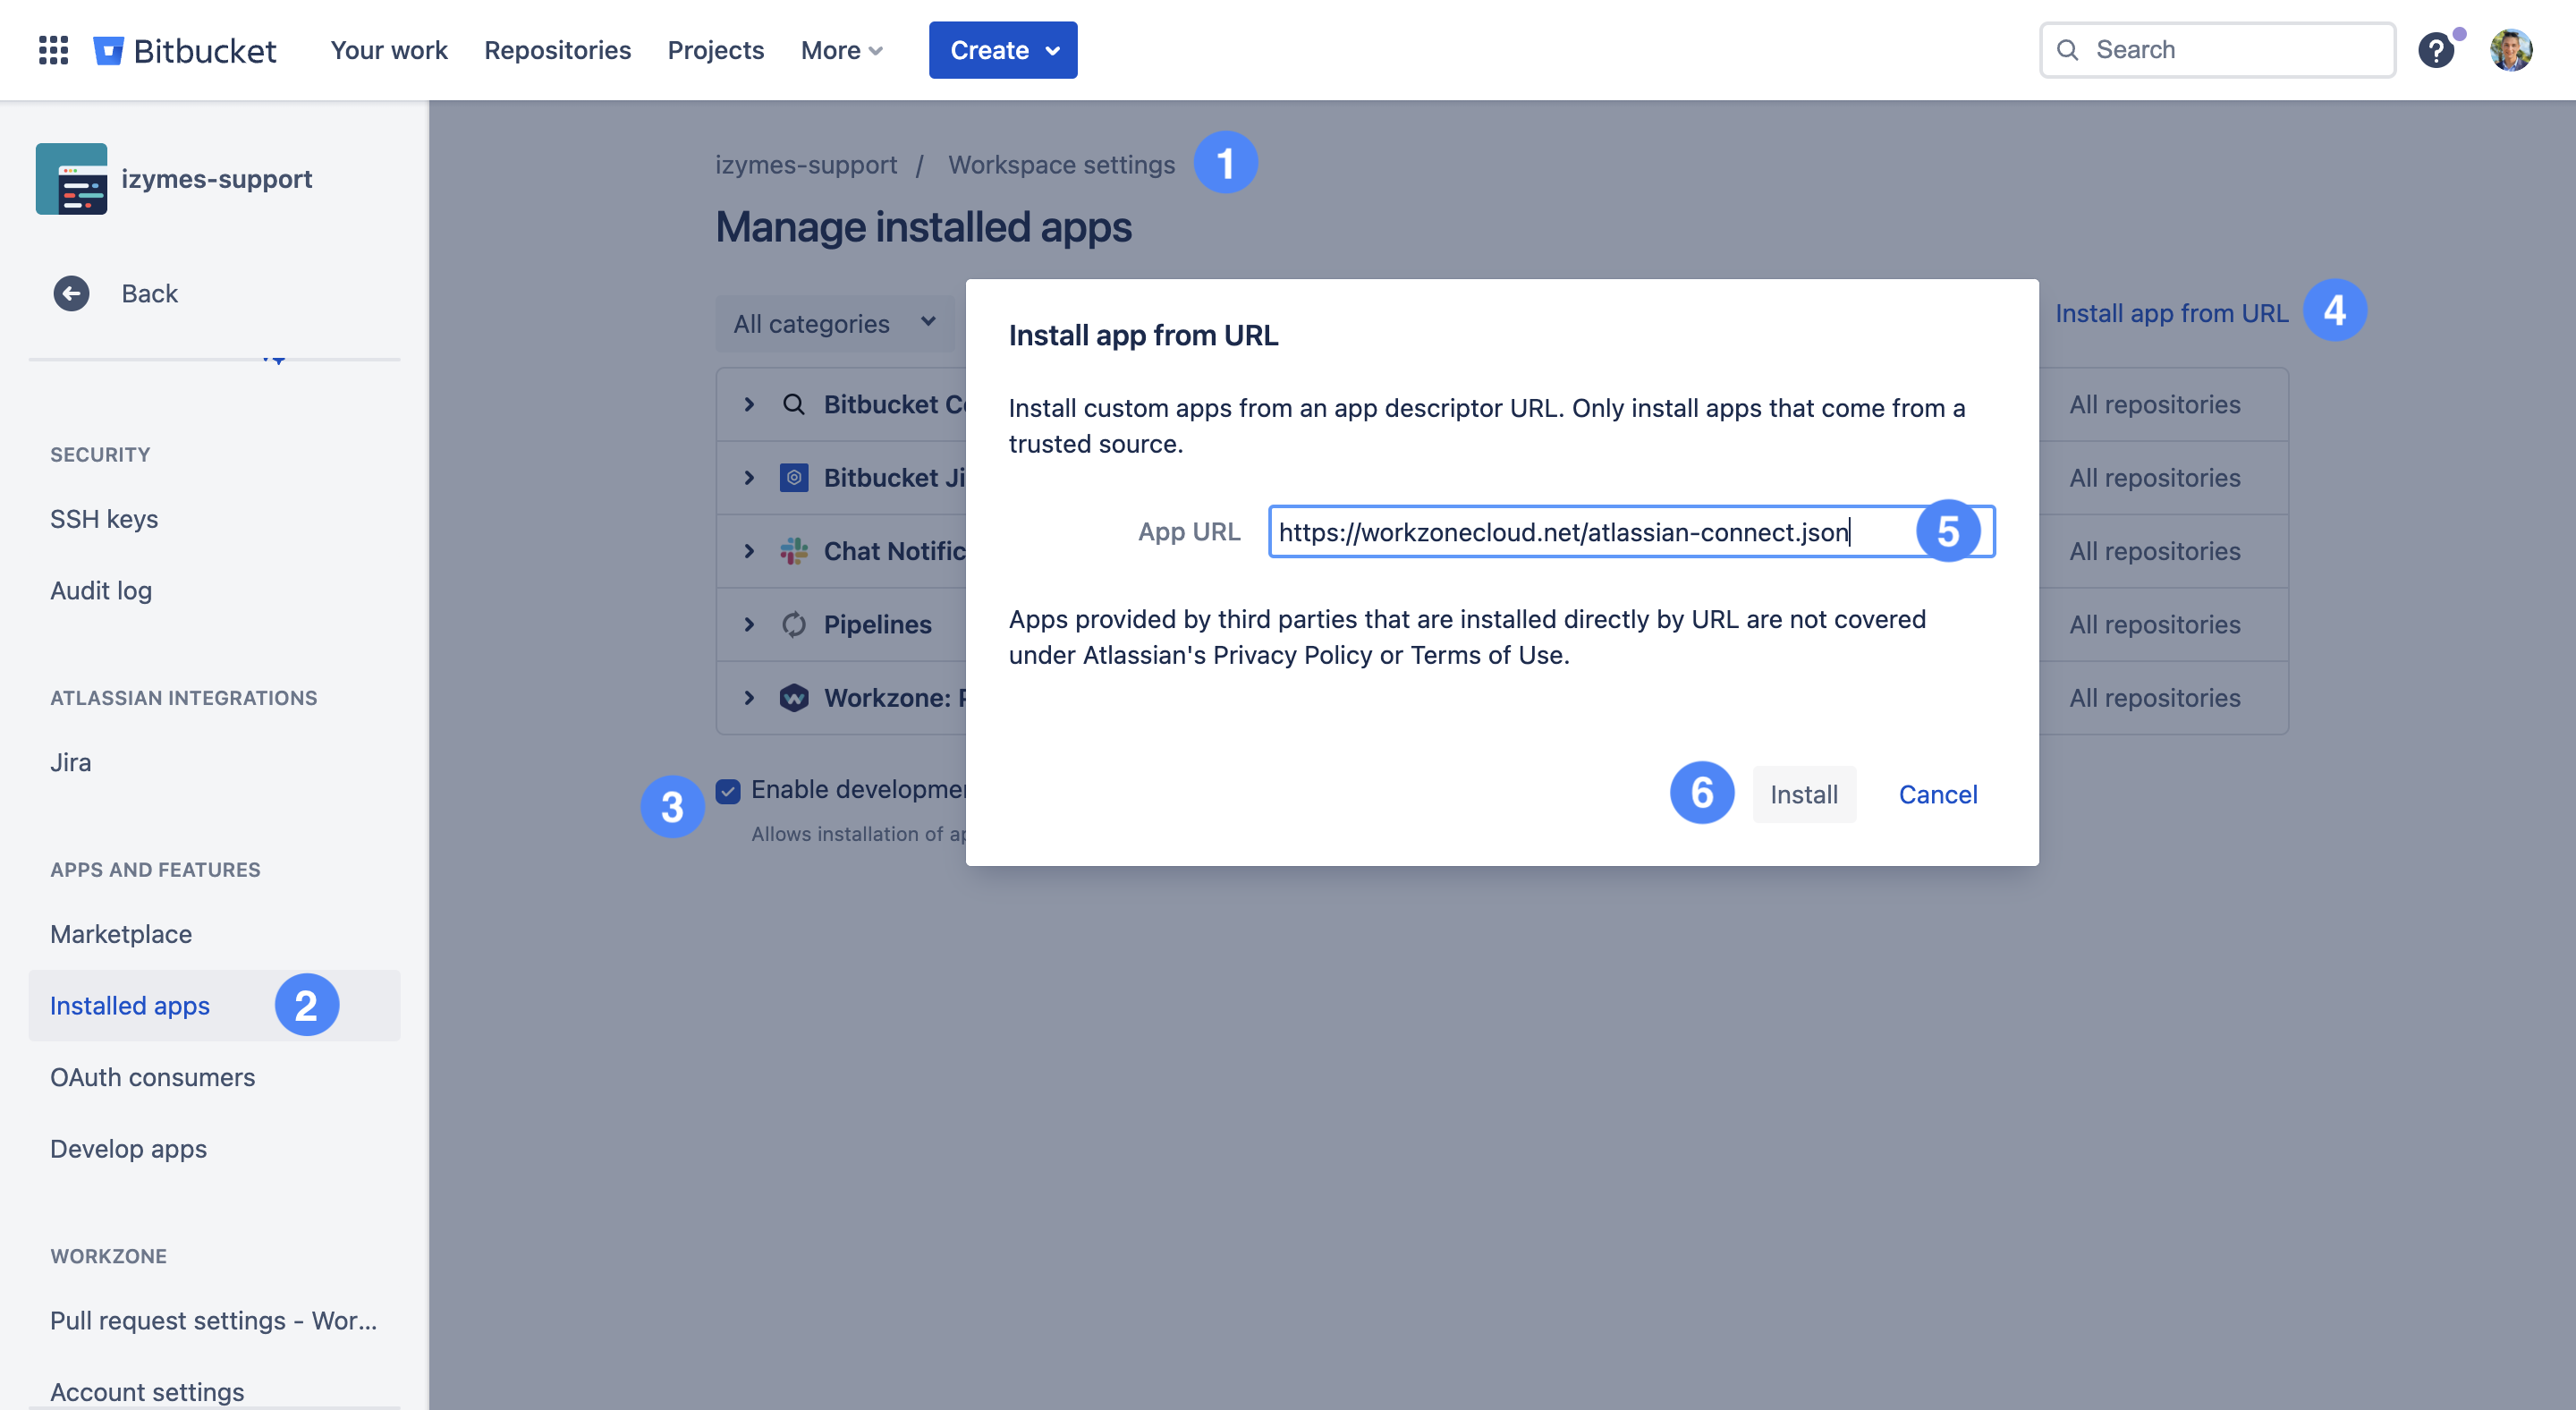
Via direct link #
- Log in as an admin and navigate to your Workspace Settings.
- Scroll down the side menu and click on “Installed Apps“.
- Enable “Development Mode”.
- Click “Install app from URL”.
- Copy and past this link into the APP URL space: https://workzonecloud.net/atlassian-connect.json
- Click “Install”.
- Workzone will request app access permissions. Click Grant access.
- Refresh the page to load Workzone menu items.
- You’re all set!
Via Atlassian Marketplace #
Follow the link to the Workzone for Bitbucket cloud listing on the Atlassian Marketplace ↗.
- On the Atlassian Marketplace page for Workzone (Cloud) click on Try it free.
- You are forwarded to bitbucket.org
- Select the workspace that you want to install Workzone into.
- Grant Workzone app access.
- You are all set!
Now it is time to set up Workzone for Cloud! When you are ready, continue on with Getting Started.


