Advanced Git merge conflict resolution techniques
Understanding Git Merge Conflicts
What are merge conflicts?
Merge conflicts occur when Git encounters conflicting changes in different branches that it cannot automatically resolve. It happens when you attempt to merge branches with overlapping modifications to the same file or lines of code. Git relies on the ability to automatically merge changes when they don’t conflict, but manual intervention is required when conflicts arise.
Causes of merge conflicts
Merge conflicts can arise due to several reasons, including:
- Parallel modifications: When two or more contributors make conflicting changes to the same part of a file or codebase.
- Branch divergence: When two branches have diverged significantly and Git cannot determine how to integrate the changes automatically.
- Deleted file or code: If one branch deletes a file or a specific section of code while another branch modifies it, Git will encounter a conflict.
- Differences in line endings and whitespace:
- Different line endings – between Unix-based systems (e.g. macOS and Linux) which use ‘newline’ characters (\n) for line breaks, and Windows systems which use both ‘carriage-return’ (\r) and ‘newline’ characters for line breaks (\r\n).
- Trailing or leading whitespace – extra spaces or tabs at the beginning or at the end of a line.
- Mixed indentation – spaces and tabs are combined in text editors to indent code.
A likely scenario is when multiple teams try to merge their feature or bugfix branches to a shared (main) branch via pull requests. By the time a feature is ready to be merged, the shared main branch will have evolved. Now the contributor is faced with a conflicted pull request – the file they have changed in the shared main branch as well, and git cannot merge automatically.
A typical merge conflict resolution workflow
If a branch that contributes to a shared main branch has conflicting changes, they must be resolved before git can merge. The goal is to create a simple trivial merge from the contributing branch to the shared main branch. The best practice is to update the contributing branch with the main shared branch so that only relevant changes are merged.
The following steps run through the update process.
- In your local repository, check out the contributing branch.
git checkout my-feature-branch - Fetch the latest from the shared main branch with
git fetch origin main - This will assign the latest commit of main to a git variable called FETCH_HEAD
- Now it’s time to merge changes from main
git merge FETCH_HEAD - Any merge conflicts are reported by git.
- Resolve all merge conflicts – read the rest of this article on how to do this efficiently and intuitively.
- Stage previously conflicted files to be committed
git add path/to/conflicted/file1 path/to/conflicted/file2 - Complete the merge process, git will take care of the commit message
git commit - Push changes to the remote repository to update the conflicted pull request or create a new pull request from the contributing branch to the shared main branch.
Congratulations – you have a pull request that can be merged!
Importance of resolving merge conflicts effectively
Effectively resolving merge conflicts is crucial for maintaining code integrity, collaboration, and ensuring the stability of your project. If merge conflicts are not addressed correctly, they will most definitely lead to broken functionality, regressions, or introduce unintended bugs into the codebase. Properly managing merge conflicts is paramount for maintaining a clean and coherent version history, enabling smooth collaboration among developers and reducing the risk of code conflicts in the future.
In the following sections, we will explore advanced techniques and tools for resolving Git merge conflicts, including interactive conflict resolution methods that can streamline the process and improve efficiency.
Git Merge Conflict Resolution Basics
When Git encounters a merge conflict, it inserts conflict markers in the affected files to indicate the conflicting sections. These conflict markers typically look like:
csharpCopy code<<<<<<< HEAD This is the code from the current branch. ======= This is the code from the incoming branch. >>>>>>> incoming_branch
Viewing and understanding conflict markers
Understanding the conflict markers is crucial for identifying the conflicting sections and making the appropriate changes. The conflict markers indicate the start and end of conflicting sections and separate the conflicting changes made in different branches. The markers also include labels (e.g., HEAD and incoming_branch) to indicate which branch the changes originated from.
Manual conflict resolution process
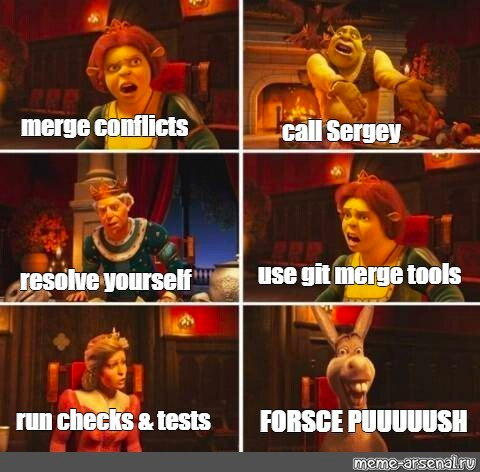
Resolving merge conflicts manually involves reviewing the conflicting sections, understanding the changes made in each branch, and deciding how to integrate them properly. Here’s a step-by-step process for manually resolving merge conflicts:
- Identify the conflicting files: Git will provide a list of files with conflicts. Use the git status command or other Git tools to identify the files that require conflict resolution.
- Open the conflicting file(s): Open each conflicting file in a text editor or an IDE that supports Git conflict resolution.
- Locate the conflict markers: Search for the conflict markers (
<<<<<<<,=======, and>>>>>>>) in the file. These markers separate the conflicting sections. - Analyze the conflicting changes: Examine the changes made in the current branch (between
<<<<<<< HEADand=======) and the changes from the incoming branch (between=======and>>>>>>> incoming_branch). - Resolve the conflicts: Edit the conflicting sections manually to merge the changes. Decide which changes to keep, modify, or discard based on your understanding of the code and the desired outcome.
- Remove conflict markers: Once you’ve resolved the conflicts, remove the conflict markers (
<<<<<<<,=======, and>>>>>>>) from the file, ensuring that the final code is clean and free of these markers. - Save the file(s): Save the modified file(s) with the conflict resolution changes.
- Add and commit the changes: After resolving conflicts in all the files, use the git add command to stage the modified files and then commit the changes using git commit.
Resolving conflicts using Git commands
Git provides various commands to aid in conflict resolution, such as:
git diff: Use this command to view the differences between conflicting branches and get a better understanding of the conflicts.git checkout --ours <file>: This command discards the changes from the incoming branch and keeps the changes from the current branch.git checkout --theirs <file>: This command discards the changes from the current branch and keeps the changes from the incoming branch.
By combining manual conflict resolution techniques with Git commands, you can effectively resolve merge conflicts and ensure the successful integration of conflicting changes.
Advanced Conflict Resolution Tools and Techniques
While manual conflict resolution is the fundamental approach for resolving merge conflicts, Git provides options to enhance the conflict resolution process.
Whitespace as the source of conflict
Ignoring Whitespace: In some scenarios, the conflicts only arise from whitespace differences. This is evident because even though the situation seems straightforward, conflicts occur when each line is removed on one side and added back on the other. By default, Git interprets these changes as line modifications, making it unable to automatically merge the files.
However, Git’s default merge strategy allows for additional arguments, some of which are designed to handle whitespace discrepancies gracefully. If you encounter numerous whitespace-related issues during a merge, you can simply abort the merge and retry it with the -Xignore-all-space or -Xignore-space-change options. The former disregards all whitespace variations when comparing lines, while the latter treats sequences of one or more whitespace characters as equivalent.
$ git merge -Xignore-space-change whitespace
Merging files with this option gets all the whitespace related merge conflicts out of the way and leaves only files with ‘real’ merge conflicts for manual merge.
Configuring a preferred text editor for conflict resolution
Git allows you to configure your preferred text editor to handle conflict resolution. By setting up an editor that you are comfortable with, you can leverage its features, such as syntax highlighting, line numbers, and search functionalities, to ease the conflict resolution process. You can configure your preferred editor using the git config command or by setting the GIT_EDITOR environment variable.
Using Git mergetools for visual conflict resolution
Git mergetools provide visual assistance in resolving conflicts by opening a specialized tool that helps you compare and merge conflicting changes. These tools offer side-by-side or three-pane views to display the conflicting sections and provide intuitive interfaces for making resolution choices.
Most IDEs that support Git provide merge conflict resolution support
Popular Git mergetools include:
- Visual Studio Code: A free and open-source source code editor by Microsoft
- Jetbrains IDEs like Webstorm, IntelliJ Idea, PHP storm
- KDiff3: A cross-platform merge tool that allows you to view and merge conflicts graphically.
- Beyond Compare: A powerful tool with advanced comparison features and a customizable interface.
To configure a mergetool, you can use the git config command to set the merge.tool and mergetool.<tool>.cmd properties in your Git configuration.
Employing diff and blame tools for conflict analysis
Git’s diff and blame tools can be helpful during conflict analysis and resolution. The git diff command allows you to view the differences between conflicting branches, making it easier to understand the conflicting changes. By analyzing the diff output, you can gain insights into the conflicting modifications and make informed decisions during conflict resolution.
The git blame command helps identify the author and commit responsible for specific changes in a file. Understanding the origin of conflicting changes can provide context and facilitate communication with other contributors when resolving conflicts collaboratively.
By utilizing these advanced conflict resolution tools and techniques, you gain better visibility into conflicting changes, and make informed decisions when resolving merge conflicts. Experiment with different tools and workflows to find the ones that suit your preferences and make conflict resolution more efficient.

Interactive Conflict Resolution with Git
Interactive conflict resolution is an advanced technique that allows you to resolve merge conflicts in a more streamlined and efficient manner. Instead of manually editing conflict markers, Git provides interactive tools that guide you through the conflict resolution process step by step. This approach simplifies the task of merging conflicting changes and helps ensure a smoother integration of code.
Introduction to interactive merge tools
Interactive merge tools that provide a graphical interface or a command-line interface for resolving conflicts. These tools typically present conflicts in a user-friendly manner, allowing you to navigate through the conflicting sections, choose resolution options, and visualize the resulting changes before finalizing the merge.
Some popular interactive merge tools include:
- Git’s built-in mergetool: Git provides a built-in mergetool that launches a text-based interface for conflict resolution. It enables you to navigate between conflicting sections, make resolution choices, and edit the final merged result.
- VS Code built-in merge tool: VS Code provides inline markers to indicate conflict areas in files and offers options to accept incoming changes, accept current changes, or manually edit and combine conflicting lines. The editor also provides a “Merge Changes” view, which allows you to resolve conflicts using a side-by-side comparison.
- IntelliJ IDEA’s merge tool: IntelliJ IDEA, a popular integrated development environment (IDE), offers a powerful visual merge tool that allows you to merge conflicts seamlessly within the IDE environment. It provides a visual representation of conflicting changes, making resolution decisions more intuitive. IntelliJ even has a merge conflict wizard that resolves trivial conflicts automatically, only hard conflicts need to be resolved manually through the GUI.
- SourceTree: SourceTree is a Git client that includes an interactive conflict resolution interface. It provides a visual diff view, side-by-side comparison, and easy-to-use tools for resolving conflicts interactively.
Setting up and configuring an interactive merge tool
To use an interactive merge tool, you need to configure it in your Git settings. Configuration involves specifying the merge tool command, the tool-specific configuration options, and any additional settings required to launch the tool.
The exact configuration steps vary depending on the tool you choose. However, in general, you can configure the merge tool by setting properties such as merge.tool, mergetool.<tool>.path, and mergetool.<tool>.cmd in your Git configuration.
Performing interactive conflict resolution step by step
Once you have set up and configured an interactive merge tool, you can initiate the interactive conflict resolution process. The tool will guide you through the following steps:
- Launching the merge tool: Start the interactive merge tool by running the appropriate Git command, such as git mergetool.
- Navigating through conflicts: The merge tool will display the conflicting sections, allowing you to navigate between them and visualize the changes made in different branches.
- Choosing resolution options: Depending on the merge tool, you can choose resolution options such as accepting changes from one side, merging changes, or editing the conflict manually.
- Previewing the merged result: Before finalizing the merge, the interactive merge tool often provides a preview of the merged code. This allows you to review the changes and ensure they align with your desired outcome.
- Saving and finalizing the merge: Once you are satisfied with the resolution, save the changes made in the merge tool and exit the tool. Git has still marked conflicted files as “both modified”, however it is now safe to tell git to “add” the previously conflicted file(s) and run “git commit “to conclude the merge.
Interactive conflict resolution with visual merge tools is a more intuitive way of dealing with merge conflicts. It simplifies the process of resolving merge conflicts, and reduces the chances of errors during conflict resolution. Experiment with different interactive merge tools to find the one that suits your workflow and preferences.
Avoiding merge conflicts
The best merge conflict resolution approach is to avoid creating them in the first place!
If the whole team follows a consistent formatting style and applies standardized Git configuration settings, it will eliminate basic sources of merge conflicts like different line endings and whitespace/tabs in the code. When tools like code formatters (we use prettier) or linters are embedded in git pre-commit hooks, they maintain consistency in line endings and whitespace throughout the code base. Git pre-commit hooks run automatically on git commit and make sure that code is automatically formatted in line with the team’s code style guide when a new commit is created.
Formatting and Whitespace
Dealing with formatting and whitespace problems can be a headache for developers collaborating across different platforms, and different editor settings for whitespace often creates merge conflicts which can be easily avoided. Patches or collaborative efforts can inadvertently introduce hidden whitespace changes, often due to editors making silent alterations. Additionally, if your files are used on a Windows system, the line endings may get altered. Fortunately, Git provides some configuration options to assist in managing these issues.
When working on Windows and collaborating with people on different platforms, you’ll likely encounter line-ending challenges. Windows employs both a carriage-return (CR) and a linefeed (LF) character for newlines in its files, whereas macOS and Linux systems use only the LF character. This subtle but vexing issue can arise during cross-platform work because many Windows editors silently substitute LF-style line endings with CRLF, or they insert both characters when the user presses the Enter key.
Git provides a solution by automatically converting CRLF line endings to LF when you add a file to the index and vice versa when you check out code to your file system. You can activate this feature using the core.autocrlf setting. If you’re on a Windows machine, set it to true, which converts LF endings into CRLF during code checkouts:
$ git config --global core.autocrlf true
However, if you’re on a Linux or macOS system using LF line endings, you don’t want Git to perform automatic conversions during code checkouts. Still, you may want Git to rectify CRLF endings if they accidentally find their way into the repository. In this case, set core.autocrlf to input:
$ git config --global core.autocrlf input
This configuration ensures CRLF endings in Windows checkouts and LF endings on macOS and Linux systems, both in the repository and on your filesystem.
If you’re a Windows programmer working exclusively on a Windows project, you can disable this functionality to record carriage returns in the repository by setting the core.autocrlf config value to false:
$ git config --global core.autocrlf false
Git offers a core.whitespace configuration for handling whitespace issues, divided into six types. Three are enabled by default and can be disabled, while the other three are off by default but can be activated.
The defaults include:
blank-at-eol: Detects trailing spaces at the end of lines.blank-at-eof: Identifies blank lines at the end of a file.space-before-tab: Flags spaces preceding tabs at the beginning of lines.
The disabled ones, which can be enabled, are:
indent-with-non-tab: Detects lines starting with spaces instead of tabs (controlled bytabwidth).tab-in-indent: Watches for tabs in the indentation part of a line.cr-at-eol: Permits carriage returns at the end of lines.
To configure these options, set core.whitespace to your desired values, enabling or disabling them with commas. Use a - before the name to disable, or omit it for the default. For instance, to enable all except space-before-tab:
$ git config --global core.whitespace \ trailing-space,-space-before-tab,indent-with-non-tab,tab-in-indent,cr-at-eol
Or customize specific parts:
$ git config --global core.whitespace \ -space-before-tab,indent-with-non-tab,tab-in-indent,cr-at-eol
When running git diff, Git detects these issues and highlights them for you to fix before committing. It also applies these settings when using git apply to apply patches. To get warnings during patch application:
$ git apply --whitespace=warn <patch>
Or auto-fix the issues before applying:
$ git apply --whitespace=fix <patch>
These options also work with git rebase. If you’ve committed whitespace issues but haven’t pushed yet, use git rebase --whitespace=fix to automatically correct them during patch rewriting.
Previous: Advanced Git bisect and blame techniques for tracking down bugs and regressions in your codebase
Next up: Alternatives to Git merge: Git’s Rebase and Cherry-pick
Until then, happy coding everyone!
Sean Manwarring
If you enjoyed this article and want to read more like it, visit our blog space 📰
Visit our flagship app Workzone – Automate and control your Pull Request Workflow, Reviewers, Compliance, Approvals and Merge Process.


