
A beginner’s guide to pull requests in Bitbucket
Are you trying to get up to speed with pull requests in Bitbucket? Then you’ve come to the right place! This guide does away with the complexity and outlines the basics for beginners – so you can start creating pull requests with confidence. You’ll be on your way to becoming a master of Bitbucket in no time!
Introduction
A pull request (PR) is an important tool in software development that helps maintain a project, keep it up-to-date, and ensure code quality. A PR is initiated when a change or set of changes needs to be reviewed by an individual or group of individuals prior to being committed to the main project. This process encourages collaboration amongst all team members involved in the project and allows them to participate in its development process.
For Bitbucket users, understanding how Pull Requests work and how they can help improve their projects is essential. When used correctly, it can help ensure everyone’s code remains accurate and secure while allowing users to deliver updates when needed quickly.
From taking a closer look at how pull requests are created and approved, to understanding why they are beneficial for Bitbucket users, this guide will provide a comprehensive overview of what PR’s entail and why they should be used by any Bitbucket user working on multiple projects and collaborating with other developers.
Throughout this guide, we will use and refer to Bitbucket Cloud as our hosting of choice, however much of the same processes apply to Bitbucket Data Center hosting.
Setting up a Bitbucket repository
Pull requests are a great way to collaborate on a code project. Before diving into the details of setting up pull requests, it’s important to first understand how to set up a Bitbucket repository.
Before setting up a Bitbucket repository, you must first create a Bitbucket account, duh…
Creating an account is simple and can be done in just a few simple steps. The first step is to visit the Bitbucket website and select “Sign Up” from the top menu bar. From there, you will fill out some basic information such as your name, preferred username and password, and email address. You will then need to confirm your account from an emailed link or code sent via text message. Once logged into your account you will have a personal workspace out of the box, or you can create another workspace dedicated to your project or company. Then you will need to create a new repository for hosting your project files.
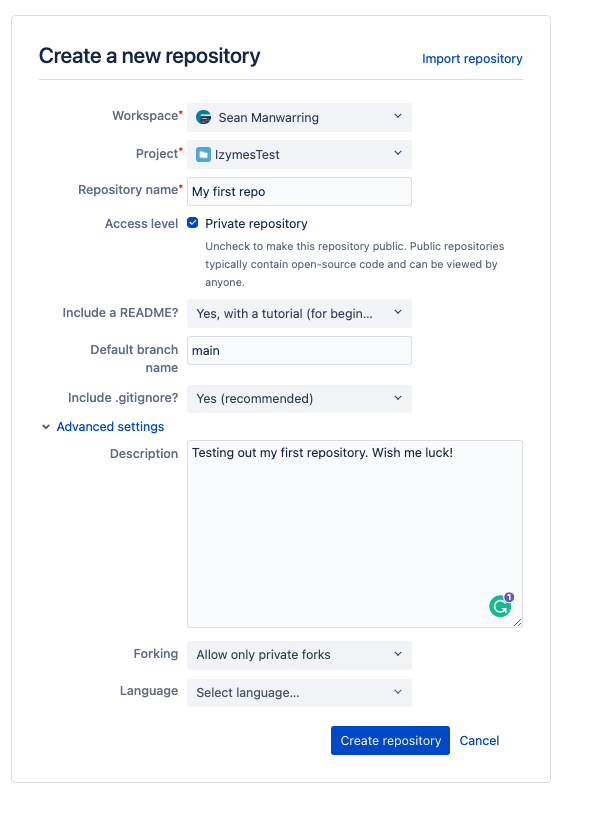
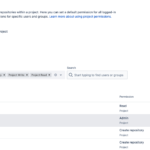
Creating a new repository is straightforward; simply click on “Create” then “Repository” from the top menu bar and fill out the required information, such as project name and description, as well as any additional settings you desire. With that complete, you’re now ready to start adding files and collaborators to your new repository so that they can help you make pull requests down the line.
Understanding the Git branching model
Pull requests in Bitbucket are an important part of the Git branching model. Understanding the basics will help you become more confident when working with pull requests.
When using a version control system like Bitbucket, developers typically create branches that represent their modifications throughout all their coding sessions. In the git branching model, a master branch is crucial as it is used to hold all working versions of an application. It is important to note that everything related to development should be made in a separate branch so that it does not mess up any current working versions or outputs for the project at hand.
The recommended way to keep track of changes in Bitbucket is by creating pull requests for each edition you make in your separate feature or task branch—particularly when you have multiple developers working on one project simultaneously.
When submitting a pull request from feature/task branches, developers can add context, mention what has been added or changed, and create conversations about things that are relevant to this edition, such as bugs, performance issues or topics requiring approval from upper management.

Pull requests also enable users to preview changes before they’re added (or merged) into the main repository since they contain information on both before and after modifications were made on files within it— including how many lines were removed/added along with who was involved in those changes. To sum up its significance: creating and merging branches through pull requests in Bitbucket helps ensure smooth collaboration between different developers while keeping everyone organized and up-to-date on any changes being made throughout their project’s lifecycle!
Creating a pull request in Bitbucket
To create a pull request in Bitbucket, users must complete a series of steps that include creating the pull request, adding their comments and details on what changes are being made, and merging the newly created branch into their target branch on the repository.
Now that you already have your new repository created, you can start the process of creating your pull request. To do this, select “Create Pull Request” from the actions tab or from a repository overview page. From here, you’ll be prompted to enter a title for your pull request. This is also where you can select which branches you’d like to merge together, should this be necessary for your particular project setup. If you would like to learn more on how to write a great Pull Request description, Gonzalo Bañuelos wrote a great article on exactly this.

Next, users need to provide a description about their new code and make pertinent comments about what they are working on within the two respective branches – the source branch and the target branch – that will be part of the merged pull requests once submitted.
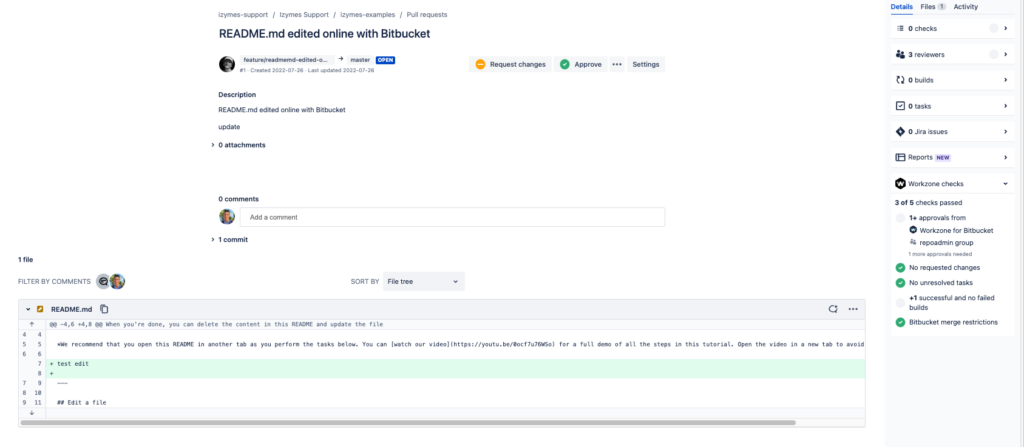
Once everything has been filled out, select “Create pull request“, at which point Bitbucket will then generate an overview page so users can review their work before pushing it live. This step aims to ensure all data points are correctly configured and no obvious issues are preventing the successful completion of coding tasks as well as providing a recordable change log file for future reference purposes if needed down the road.
Finally, once everything has been checked over one last time it’s time to go ahead with the final submission by selecting “Merge Pull Request“. At this point, Bitbucket will move forward with integrating both changes into each other’s respective branches, along with attaching any associated messages penned upon creation prior to the merge process completion logs.
Reviewing and merging pull requests
Bitbucket has enabled users to easily review and merge pull requests directly from their repository.
Repository owners or reviewers should be able to review each of these proposed commits by running through their checklist items, such as readability standards and checking for typos or errors before merging it into their production branch. If any problems arise during this stage of evaluation, then they can always restart back to the Create a Pull Request step until all criteria have been satisfied before proceeding onto the notification stage where everyone involved receives an email indicating that merge was successful and finalized.
Following these steps will help ensure secure collaboration between stakeholders while ensuring all standard policies are met prior to any merging occurs.
Tips for effective pull requests in Bitbucket
When creating a pull request in Bitbucket, teams should ensure that they use descriptive titles and descriptions of their changes so that others quickly understand their purpose. It is also important to provide high-level summaries of changes so that reviewers can efficiently grasp the full scope of the proposed change without having to spend too much time delving into details. Furthermore, including links to tickets or JIRA issues can help provide valuable context for reviewers.
Finally, when reviewing pull requests in Bitbucket, teams should use their descriptive comments feature to explain why a particular change is being made or find issues with existing code changes while avoiding making assumptions or rushing through reviews. Common mistakes that should be avoided include making assumptions, leaving out comments on why changes are being made or failing to properly verify coding standards have been met prior to merging new code into the main branch of your repository. Following these tips will help teams create and review pull requests more effectively in Bitbucket.
Conclusion
I hope our beginner’s guide to pull requests in Bitbucket has provided valuable insights into the key steps involved in using pull requests for software development. Pull Requests are an effective best practices that allows developers to work together efficiently and accomplish their goals quickly. It also provides a review process for code and allows teams to ensure that their codebase is up-to-date.
Additionally, this method of collaboration simplifies the manual review process compared to sending diffs or code files back and forth over email. This makes it easier to track changes and progress on a project over time, as well as ensuring that all team members are aware of any pertinent issues that might require additional attention or discussion.
Finally, creating pull requests in Bitbucket offers developers additional benefits such as creating labels and assigning tasks related to the pull request being opened, recurring messages from reporters about their work being merged or rejected, searching through a list of previously closed pull requests and so on.
In conclusion, this article has provided a summary of the key points covered in using Pull Requests for effective software development. This includes an overview of the advantages offered by creating PRs with Bitbucket, a detailed explanation on how to open one successfully and some additional tips on how best to use them throughout your development cycle. With this information in mind, developers can now be confident utilizing this powerful tool to collaborate on projects more effectively than ever before!
Frequently Asked Questions
Q1: What is a pull request in Bitbucket?
A1: A pull request in Bitbucket is a feature that allows a developer to request that changes they have made be reviewed and eventually merged into a repository. Pull requests allow developers to see conversations around the proposed changes, as well as any feedback that is given.
Q2: How do I create a pull request in Bitbucket?
A2: To create a pull request, open your Bitbucket account and locate the repository that contains the changes you want to submit. Once you have found the repository, click “Pull Requests” in the left sidebar and then click “Create Pull Request”. From there, you can add details about your changes, assign reviewers and submit the pull request.
Q3: What are some best practices for pull requests in Bitbucket?
A3: Some best practices for pull requests in Bitbucket include adding a clear title and description, providing a list of relevant issues, tagging relevant people, and reviewing the changes before submitting. Additionally, it is important to provide detailed comments and respond to feedback quickly.